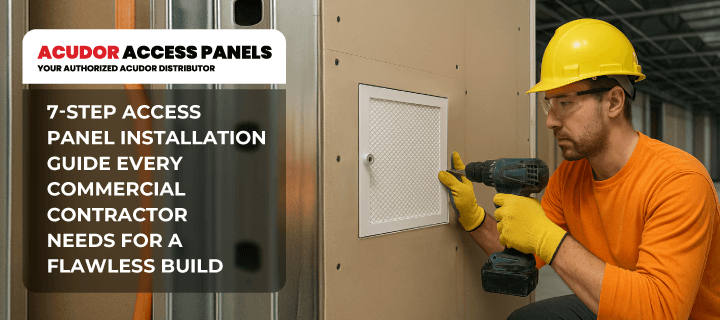
7-Step Access Panel Installation Guide Every Commercial Contractor Needs for a Flawless Build Posted by Acudor Access Panels on 12th May 2025
Let’s be honest—no contractor wants to deal with costly rework, especially when it's caused by something as avoidable as a poorly installed access panel. You’re juggling schedules, subcontractors, inspections, and client expectations. One small mistake can throw everything off.
Incorrect placement, improper sealing, or missed specs aren’t just minor hiccups. They lead to delays, extra costs, and sometimes tearing into finished work to fix what should’ve been right the first time.
With the right steps in place, you can ensure every access panel is installed correctly and efficiently.
1. Review the Specs and Plans
Before you reach for a tape measure or utility knife, slow down. Take a beat. Look at the blueprints and read the product specs. Seriously, just five extra minutes here can save you hours of frustration later.
Not all access panels are built the same, and using the wrong one in the wrong spot can set you back fast. Some access panels are fire-rated, like the FB-5060-TD Fire-Rated Un-Insulated Recessed Door for Tile Walls - Acudor. Here’s why people love this access solution:
- Fire Rating: The UL "B" label is for 1 1/2 hours, while the ULC "B" label is for 2 hours. These labels are designed to maintain continuity in fire barrier walls.
- Convenient Locking Mechanism: It features a universal self-latching bolt, operable with either a knurled knob or flush key. The FB-5060-TD can also be prepared for master keying with rim or mortise cylinder locks.
Looking for more information? Explore common questions and answers about fire-rated access doors.
To avoid installing the wrong panel in the wrong place, make sure you’re clear on the access panel installation steps for contractors.
Think of it like assembling IKEA furniture. You might think you know where that shelf goes, but one wrong move and you’re halfway through the build before realizing you’ve got it upside down. Then it’s backtracked, undo, redo—time wasted.
2. Choose the Right Location
Just because access doors and panels fit in a wall doesn’t mean they belong there.
Access panels are meant to be used, not just admired. That means considering the needs of the person opening them later. Will they need to reach in to adjust HVAC controls, clear a plumbing clog, or check electrical connections? Make sure you choose the right spot to install them.
Before moving on to the next step, learn about the installation requirements for access doors and roof hatches in commercial buildings. Want more tips? Check out our other blogs for practical guides and expert insights!
3. Mark Your Cut Area
Use a level and mark the outline for the access panel exactly where it needs to go. Take your time here. As the old saying goes—measure twice, cut once.
One wrong line, and you might slice into something you don't want to—like insulation, studs, or even worse, wiring. Now you've got a bigger problem than just patching drywall; you've got delays, extra labor, and possibly a "why is this on fire?" moment.
Bonus tip: Mark the edges lightly so you won’t scrub away heavy black lines if you need to adjust.
4. Prep the Surface
Think of this step as prepping a canvas before painting. You wouldn’t slap paint on a dirty wall and expect a masterpiece—and you don’t install an access panel on a busted surface and expect it to hold up.
First, check the area around your cut. Is it smooth? Clean? Free of weird bumps, leftover nails, or crumbling edges? If not, fix it now. A little extra effort here goes a long way—trust us.
Working with drywall? Sand it smoothly. Masonry? Brush off the dust and loose bits. Tile? Make sure nothing’s chipped or uneven. You want a clean, level area that your panel can sit flush against—because even the best panel can't fix a messy installation.
5. Make the Cut
Alright, it’s time to cut. But hold up, this isn’t a cooking show. You’re not dicing onions. You’re slicing into a wall that might be hiding wires, pipes, or who knows what else.
Pick the right tool for the job. For drywall, go for a drywall saw or an oscillating multi-tool. Tile or masonry? You’ll want a grinder, or something built to handle tougher surfaces.
Pro tip: Cut inside your markings first, then clean it up if needed. That way, your panel fits snugly, and you avoid gaps that’ll make your installation look sloppy.
6. Fit and Fasten the Panel
Slide that access panel into place but don’t just jam it in and call it a day. Take a second. Step back. Check that it’s sitting flush with the wall or ceiling.
Follow the manufacturer’s instructions like a GPS. Use the proper anchors, fasteners, or mounting brackets—especially if you work with a heavy-duty or fire-rated access door.
You don’t want that thing sagging or shifting over time. Or worse—falling off mid-inspection.
7. Seal and Finish
The last step of our commercial access panel installation guide is to make it pretty. Even the toughest access panel deserves a clean finish. Think of this like the final polish on a classic car or the last brushstroke on a mural—you wouldn’t leave a project 95% done, right?
Once sealed, smooth out the edges. Patch it up with plaster, mud, or filler so it blends right into the wall or ceiling. Then, paint or finish it to match the surrounding surface.
When clients or inspectors walk through, this kind of detail stands out. It shows that you don't just build—you build well.
Conclusion
Following these seven steps might take a few extra minutes upfront, but it’s worth every second. You’ll avoid rework, keep your project on schedule, and deliver a clean, professional result that holds up under scrutiny.
So, before you rush into the installation, take a beating. Double-check your specs. Measure with care. Seal it like you mean it. That’s how flawless builds happen.
Need the perfect fit? We’ve got it.
Acudor Access Panels offers custom access panels that match your specs—fast, reliable, and ready for any job.
Call +1 (888) 617-4472 now and get exactly what your project needs without the hassle!
Acudor Access Panels is a trusted and authorized distributor of Acudor products. We are proud to bring you their full range of industry-leading access doors and panels.


